Blog
How to Use Glow in the Dark Iron On Vinyl?
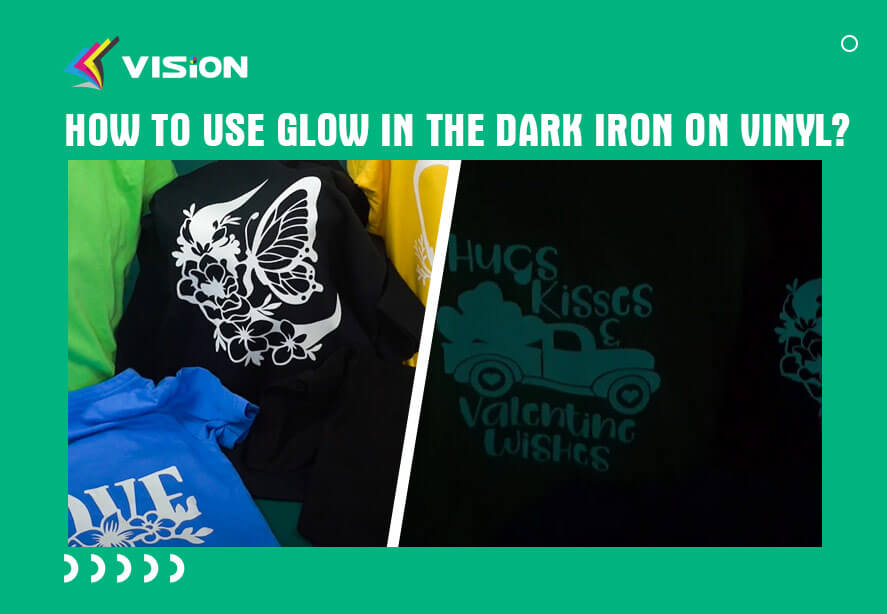
Using glow in the dark iron-on vinyl is a fun and creative way to add a luminous touch to your projects. Here’s a step-by-step guide on how to use glow in the dark iron-on vinyl:
Gather Your Supplies
Glow in the dark iron-on vinyl
Cutting machine or scissors
Fabric to apply the vinyl on
Iron
Teflon sheet or thin cotton cloth
Weeding tool (if using a cutting machine)
Design or image for your project
Getting Started
Design Your Project
Create or select the design or image you want to apply using software or online design tools.
Keep in mind that intricate designs may be more challenging to cut and weed.
Prepare Your Vinyl
Load the glow in the dark iron-on vinyl into your cutting machine, making sure the shiny side (the carrier sheet) is facing down.
Adjust the settings on your cutting machine according to the manufacturer’s instructions. If cutting by hand, trace your design onto the vinyl and carefully cut it out.
Weed the Excess Vinyl
If using a cutting machine, use a weeding tool to remove the excess vinyl around your design, leaving only the desired image on the carrier sheet.
If cutting by hand, carefully peel away the excess vinyl, leaving the design intact on the carrier sheet.
Preheat Your Iron
Set your iron to the recommended temperature (usually between 300°F and 320°F). Check the instructions provided with your glow in the dark iron-on vinyl for the specific temperature.
Position and Apply the Vinyl
Place your fabric on a flat, heat-resistant surface.
Position the glow in the dark vinyl onto the fabric, adhesive side down. Make sure it is centered and aligned as desired.
Cover the vinyl with a Teflon sheet or thin cotton cloth to protect it during the ironing process.
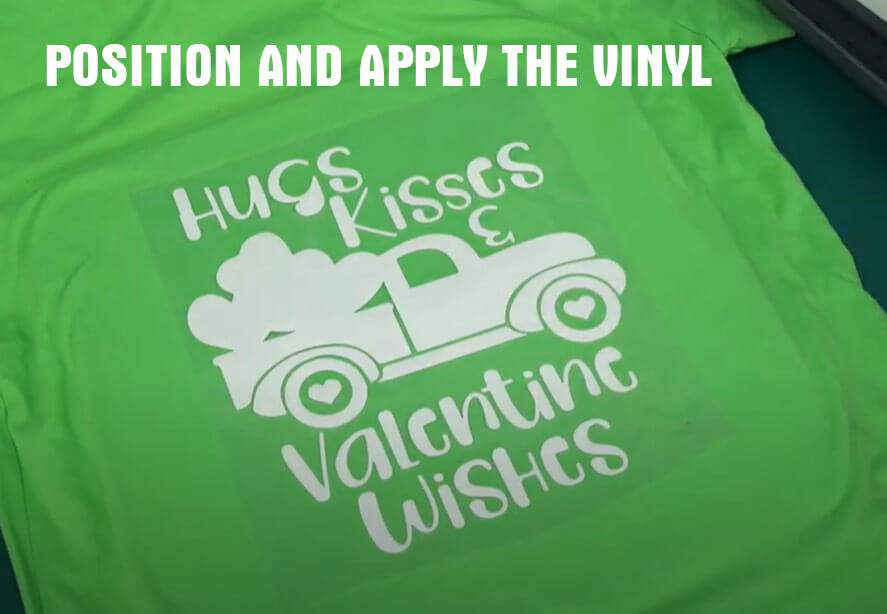
Position and Apply the Vinyl
Apply Heat and Pressure
Press the preheated iron firmly onto the Teflon sheet or cloth, applying even pressure. Move the iron in a back-and-forth motion for about 15-20 seconds.
Repeat this process for the entire design, ensuring all areas receive adequate heat and pressure.
Peel the Vinyl
After removing the fabric from the iron, carefully peel off the carrier sheet while it is still hot (Hot peel is suitable for VISION glow in dark vinyl). Start at one corner and gently pull at a sharp angle to avoid lifting any parts of the design. If any part of the vinyl lifts with the carrier sheet, place it back down and apply more heat and pressure.
A Guide to Using Glow in the Dark Heat Transfer Vinyl
If you are using VISION’s glow-in-the-dark tshirt vinyl, please follow any additional instructions provided by VISION factory for best results. Let your creativity shine through luminous designs!
Tips for Working with Glow in the Dark Iron-On Vinyl
To achieve the best results with glow in the dark iron-on vinyl, consider the following tips:
Ensure a clean and dry fabric surface before applying the vinyl.
Test the vinyl on a small, inconspicuous area of the fabric to ensure compatibility and desired glow intensity.
Use a Teflon sheet or a thin cotton cloth to protect the vinyl during the ironing process.
Apply even pressure and heat when ironing to ensure proper adhesion.
Wash garments inside out and avoid using harsh detergents to prolong the life of the glow effect.
Glow in the dark iron-on vinyl offers a captivating way to bring your creative ideas to life. Whether you’re designing eye-catching apparel, customizing accessories, or adding a touch of magic to your home decor, this unique material allows you to create designs that glow in the dark.